
How to QA Experiments Using Google Optimize
Conversion rate optimization is a structured, systematic approach to increasing the percentage of users who perform a desired action on a website. It’s common practice to generate hypotheses and validate those hypotheses by comparing them through experimentation (i.e., A/B testing, Personalization).
We work very hard to make sure experimentation works properly, so this process should begin with Quality Assurance (QA).
Google Optimize (GO) offers three approaches to check that your experiments are working properly. You can:
- Use default previews (e.g., web preview, tablet preview, mobile preview).
- Use shareable preview links.
- Make experiments live on QA audiences and set variation traffic to 100%.
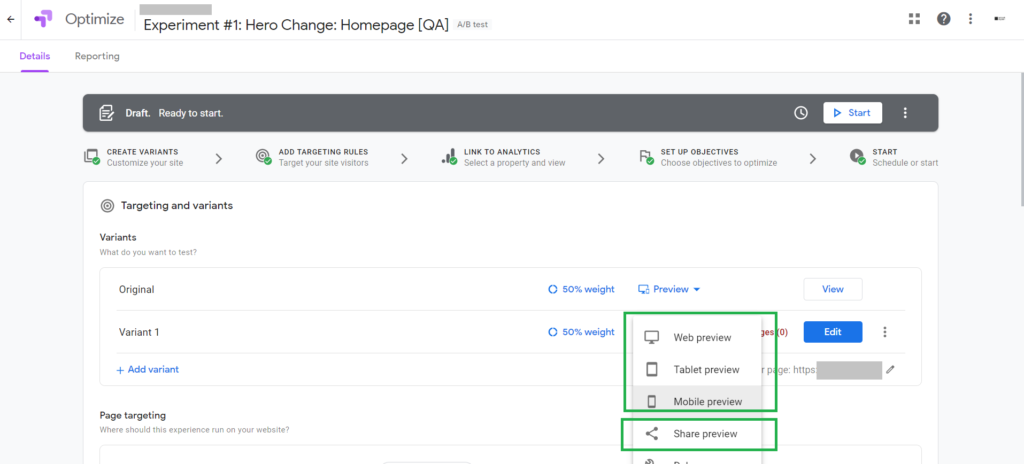
To use either of the first two approaches, you can go to the experiment details dashboard on your GO container, then click any of the dropdown links shown in the screenshot below.
The third solution, however, is the best approach.
What’s Wrong with Default Previews and Shareable Preview Links?
To use default previews, you need to be logged into your GO container. Even then, it might not work; it may ask you to remove or enable cookies, or even restart the browser. Because of the way the technology works, this can render unexpected results. Moreover, it does not validate your targeting and audience condition.
Shareable preview links present the same problems. This approach won’t work if your browser’s third-party cookies are not enabled. (Most modern browsers disable third-party cookies by default.) And as a result, you might not be able to see the variation.
Option Three: The Best Approach
Making experiments live on QA audiences and setting variation traffic to 100% will help you avoid all the aforementioned problems and can even validate your targeting and audience conditions.
You can create a QA audience by query parameter, cookies, or any unique JavaScript conditions. But GO provides a better approach called “UTM parameter,” where you can set a unique experiment specific value to QA your experiment. You can even have just one simple URL for QA throughout the whole journey.
To take this approach, follow these steps:
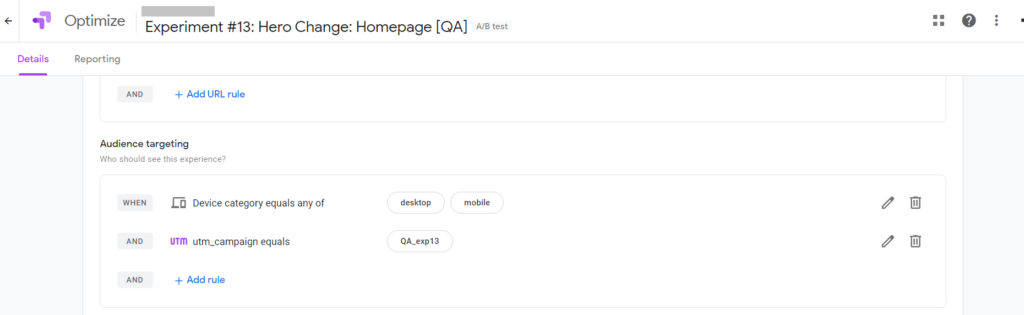
1. Add an extra experiment-specific QA audience with “UTM parameter” along with your default audiences. You can use this simple rule:
– UTM parameter equals QA_expX | X could be any identifier

You can replace “QA_exp13” with any text you’d like. I just used something that makes it easy to separate and understand that this audience is for a specific experiment QA.
After you add the QA audience, you’ll be able to see it with your default audiences, like in the screenshot below.
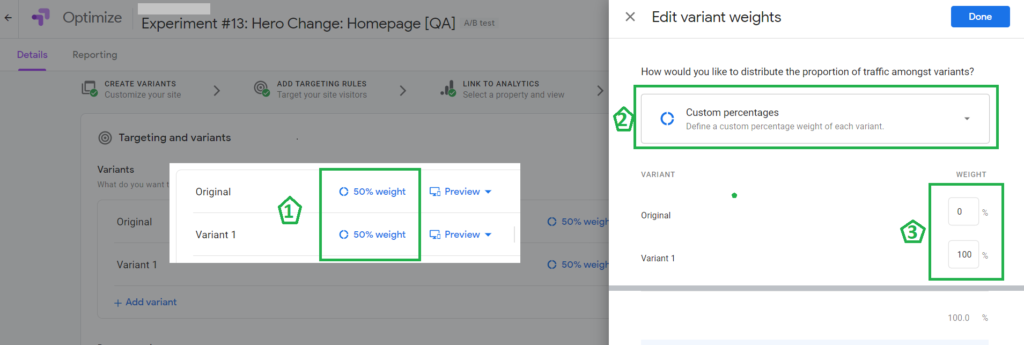
2. It’s time to set your variation traffic to 100%. Click on “xx% weight” from any of the variants. Select “Evenly split” and change it to “Custom percentages.” Set variation weight to 100%, so that all traffic goes to the variation. If you have multiple variations, set 0% weight to all variants except the one you want to QA right now. You can alter the variation weight when you want to QA a different variant.
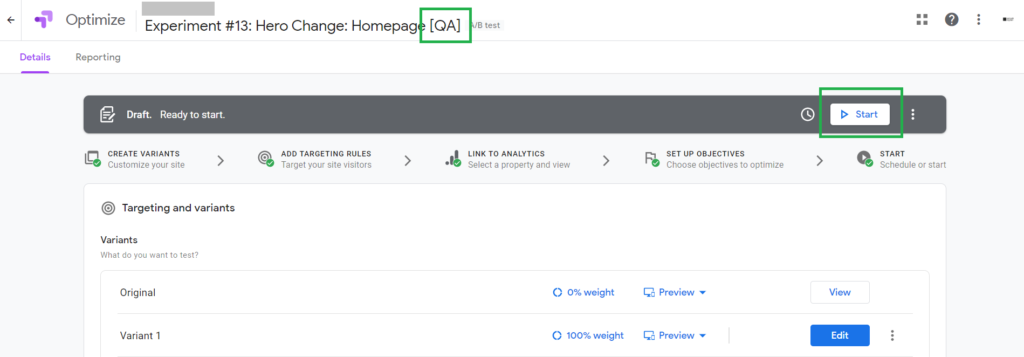
3. Now add the suffix “[QA]” to the experiment name and make your experiment live by clicking “Start” button. Suffix added to understand experiment is live for QA.
4. Open a new private or incognito window in your browser. Then open the following URL:
– http://www.yourwebsite.com?utm_campaign=QA_exp13
The above URL is an example. You need to change it to match your website domain and the parameter you’ve set in the QA audience you just added in step 1.
You will now be able to see the variation, even if your experiment is on the cart page. Your QA URL will be the same as the above. You just need to navigate to the cart page.
5. When QA is done, you can stop and clone the experiment, remove the QA audience, rename it as you want, and publish the experiment. This will give you fresh, influence-free results.
NOTE:
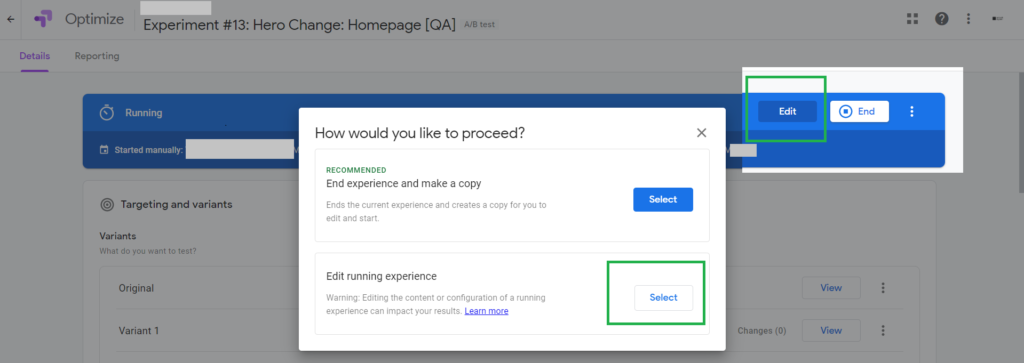
If you have multiple variations and now want to alter traffic to see a different variant, you need to click “Edit”, then click “Select” in “Edit running experience,” option and alter traffic by clicking “xx% weight,” just like we did in Step 2.
You can learn more about ‘UTM Parameter’ from here
SUMMARY:
- Add an experiment-specific QA audience with “UTM parameter”.
- Set your variant traffic to 100% by choosing “Custom percentages”.
- Add the suffix “[QA]” to the experiment name.
- Make your experiment live by clicking the “Start” button.
- Start QA on your variation with a simple QA audience URL.
- When QA is finished, stop and clone the experiment to get influence-free results.